Friday, May 22, 2009

The HDR debate goes on - how much is too much?

CCE 300c vertorama 4505-10 lucis

Reading through another debate on the HDR flickrgroup - I had to laugh - throughout history fear of change and anything new has always been prevalent.

Portrait painters thought photography wasn't real portrait work because a camera was used.

Fast forward to a generation of film photographers calling DSLR users "computer operators." I still get told I'm not doing photography. They may be right, but that has little to do with it being a digital camera.

Then what is and isn't an HDR. These type of debates will go on as long as someone is afraid of anything different.

Beauty is in the eye of the beholder. If it doesn't look good to you, go on to the next one.

Tonemapping is a dial we use to render an HDR so it can be viewed on an RGB monitor. How high and far we turn that dial is based on what looks good to the person tonemapping the image.

For those who want to rigidly define what is or isn't ... or how far you can turn the above dial, please go lock yourself in that cage and enjoy it.

Meanwhile if I see something I enjoy seeing, the last thing I'm going to do is relegate it to someone's defined subgroup.

I don't like some of my own HDR's but I post them to get feedback on them. The reviews have been mixed and thanks to a few I've made some improvements I believe in what I do.

Lastly someone who 'hates HDR's" is going to anyway no matter which one he or she is looking at. That's the thing about opinions - everyone has one - and they DO vary.

Enjoy what you see, life's too short not to.

My next posts will be on hand held tips and then tonemapping and or processing and may be broken into parts to keep it from being too lengthy.

The image at the start of this post was hand held using the car lot's fence as a pivot.

Wednesday, May 13, 2009

What is an HDR Part 2 - the shoot

How to take the pictures for an HDR

archstone towers 3588-90 603-605

HDR Photography

HDR Photography Creating high dynamic range images involves a little planning and setup time, but the results can be wonderful. Here's a step-by-step approach to help you ease into creating HDR images.

1. Bracketing
Setup your camera to bracket 3 or more images. Ensure that your bracket covers the entire range of light that is present in the scene.

2. White Balance
Set your white balance to whatever the scene requires, but don't use auto.

3. Mount the camera on a tripod.
Having a stable base for your camera is very important and means less alignment issues in post productions. While hand-held HDR is very possible, and many people create very successful images with this technique, having a sturdy tripod will give you the best results. If you have a model in the scene, just ask them to hold as still as possible for a few seconds.

4. Cable Release
Attach the Cable release, or set the camera to use the self timer. You do not want to touch the camera at all. Even the slightest movement can cause alignment issues with your final images.

5. Switch the camera to aperture priority and make your aperture F8 This step is only to give you a direction in where to begin, let me add that some people prefer to actually shoot at smaller apertures, experiment, and adapt this step to your workflow.

6. Mirrior Lock-up
When bracketing your shutter speeds may get very slow and the mirrior can cause vibrations that blur the image. Mirrior lock-up helps you to avoid the mirrior slap that creates this.

7. Shoot
Now, just take your series of photographs! You have successfully just captured a set of images that will merge into an hdr picture

Tuesday, May 5, 2009

What is an HDR?

bmw_3630_1_2fractalius

What is an HDR?

There is a debate on in the various HDR Flickr groups, in fact, all over the internet as to what an HDR is or is not. If you want to get into it you can the technical opinion and debate here:

discussion

Flickr photographer with a lot of links about HDR

I'm going to attempt my take on it based on my experience using HDR files at work and at home.

We probably should define it first - the following is from wikipedia - "In image processing, computer graphics, and photography, high dynamic range imaging (HDRI or just HDR) is a set of techniques that allows a greater dynamic range of luminances between light and dark areas of a scene than normal digital imaging techniques. The intention of HDRI is to accurately represent the wide range of intensity levels found in real scenes ranging from direct sunlight to shadows."

What?

Okay let's try this again from a photography point of view:

Photographers use "dynamic range" for the luminance range of a scene being photographed; or the limits of luminance range that a given digital camera or film can capture; or the opacity range of developed film images; or the reflectance range of images on photographic papers.

Graduated neutral density filters are used to increase the dynamic range of scene luminance that can be captured on photographic film (or on the image sensor of a digital camera). The filter is positioned in front of the lens at the time the exposure is made; the top half is dark and the bottom half is clear. The dark area is placed over a scene's high-intensity region; usually the sky. The result is more even exposure in the focal plane, with increased detail in the shadows and low-light areas. Though this doesn't increase the fixed dynamic range available at the film or sensor, it stretches usable dynamic range in practice.[14]

In the domain of digital imaging, algorithms have been developed to map the image differently in shadow and in highlight to better distribute the lighting range across the image. These techniques are known as high dynamic range imaging.

Whoa way too technical!

See this isn't easy - here's still another - no less obfuscating:

Dynamic range is a term used frequently in numerous fields to describe the ratio between the smallest and largest possible values of a changeable quantity, such as in sound and light.

On imaging it refers to the ratio of the highest and brightest color tone value to the lowest.

For example, a good quality LCD display has a dynamic range of around 1000:1 (commercially the dynamic range is often called the "contrast ratio" meaning the full-on/full-off luminance ratio), and some of the latest CMOS image sensors now have measured dynamic ranges of about 11,000:1 (reported as 13.5 stops, or doublings).[1] Paper reflectance can achieve a dynamic range of about 100:1.


The above comes closer to what I know - the ratio of the darkest part of an image to the lightest.

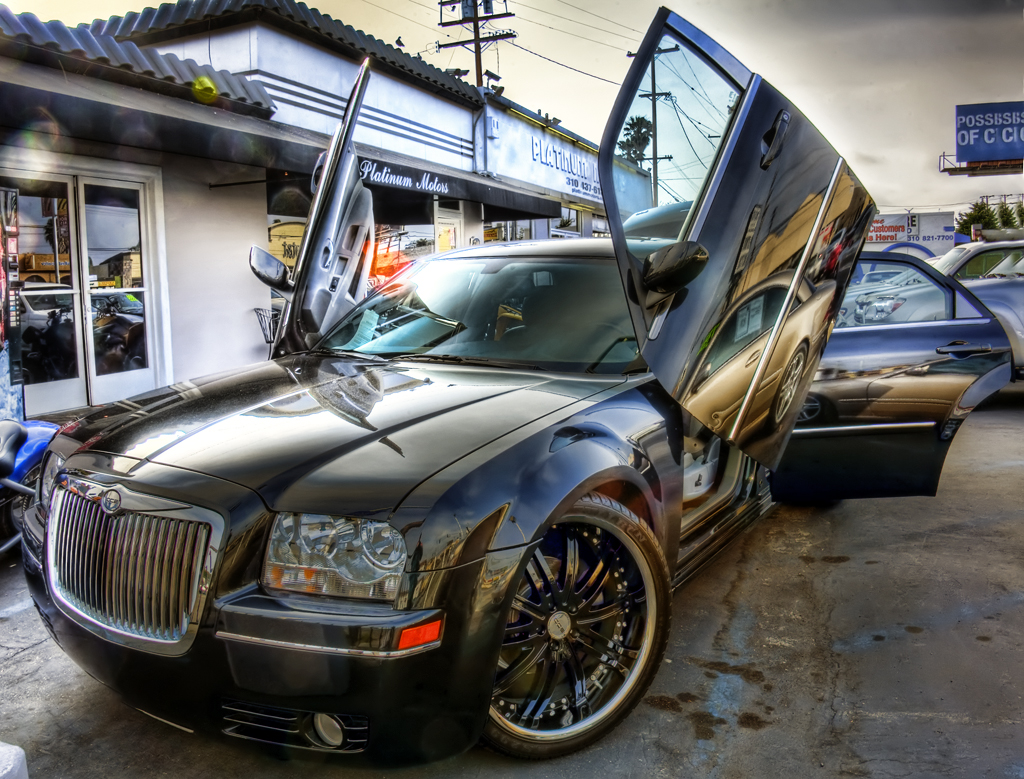
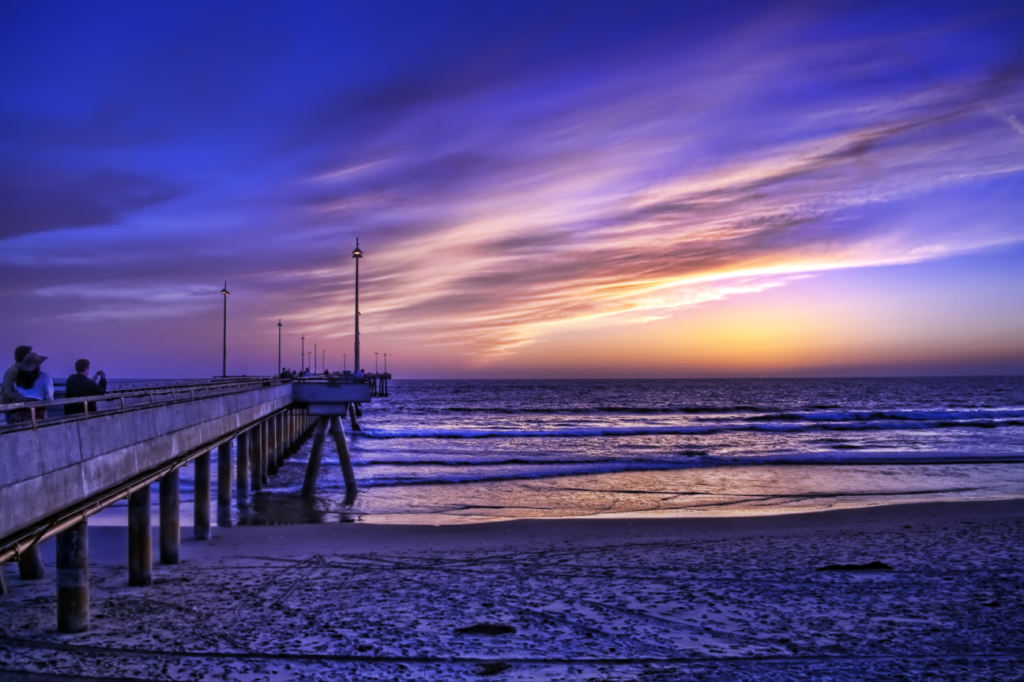
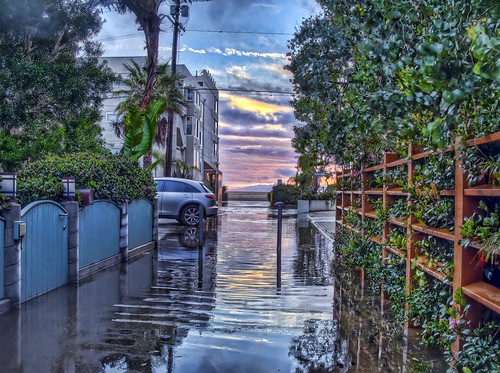
Cameras - film or digital - can typically provide a 6 f-stop range of light values accurately before it begins to peak at white or black. HDR's attempt to broaden that ratio of dark to light past the point of what your camera interprets.

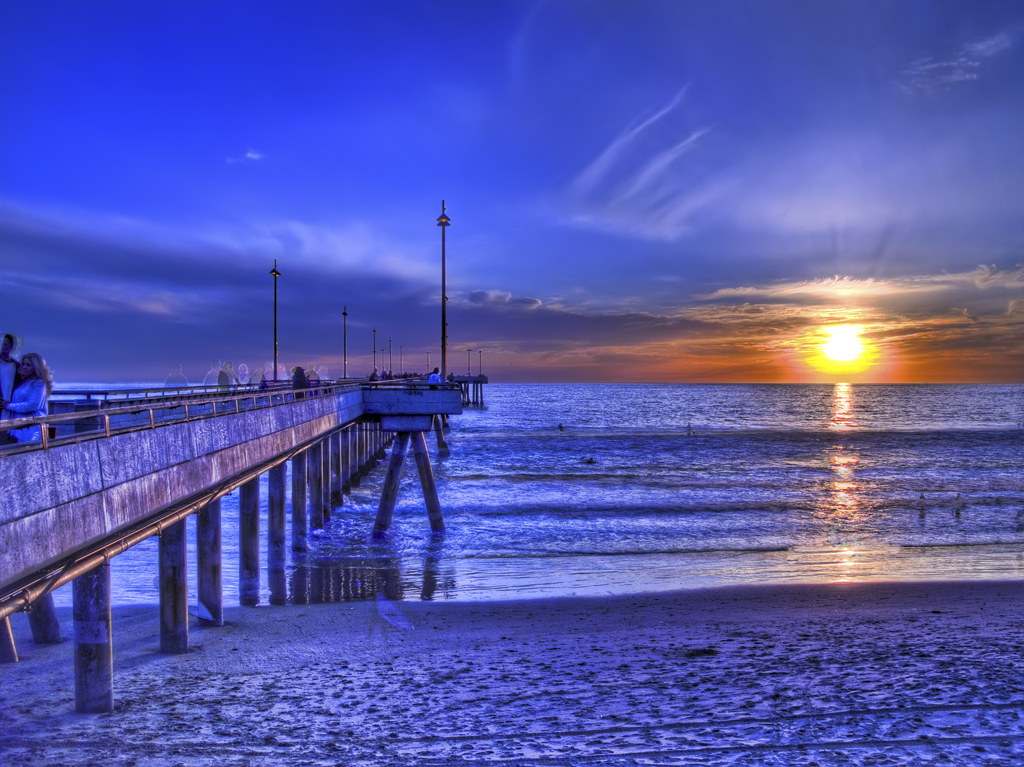
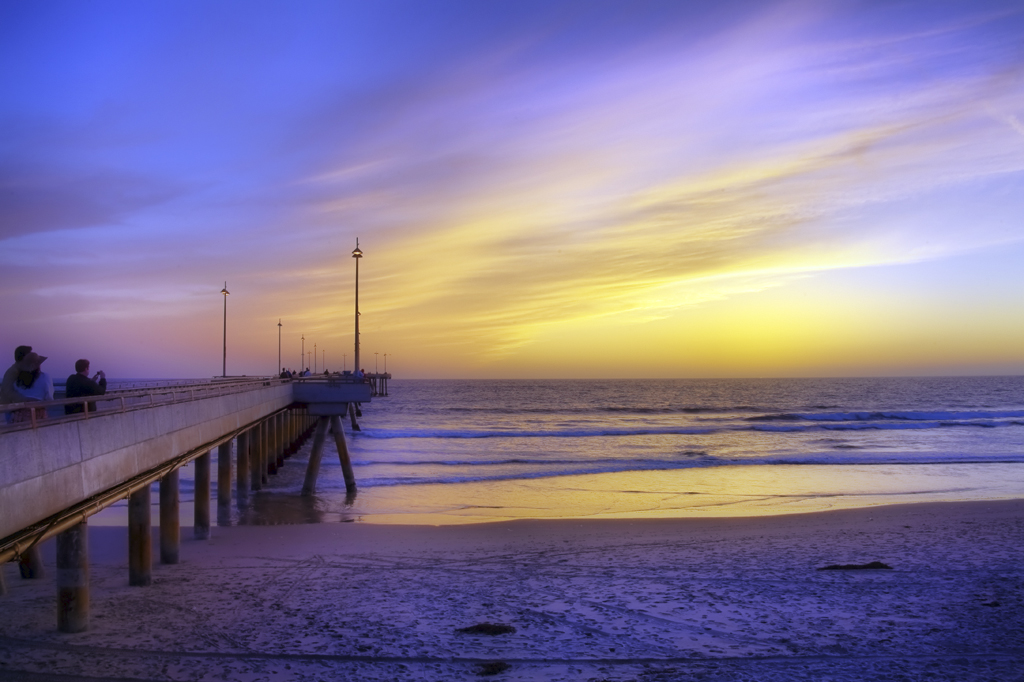
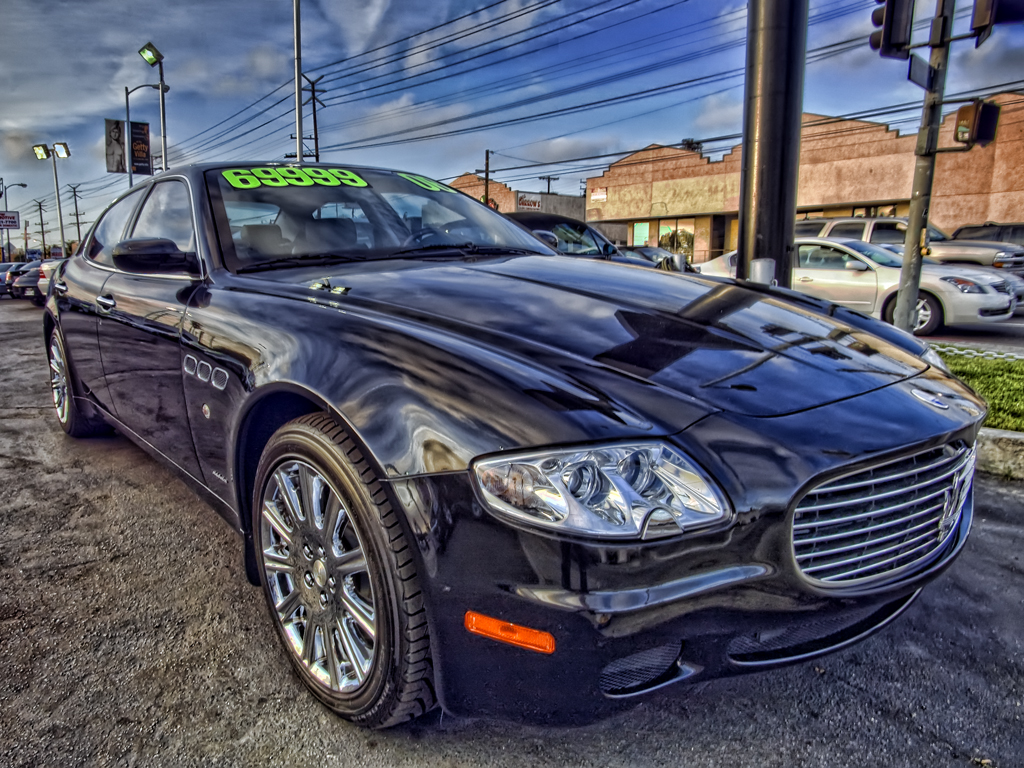
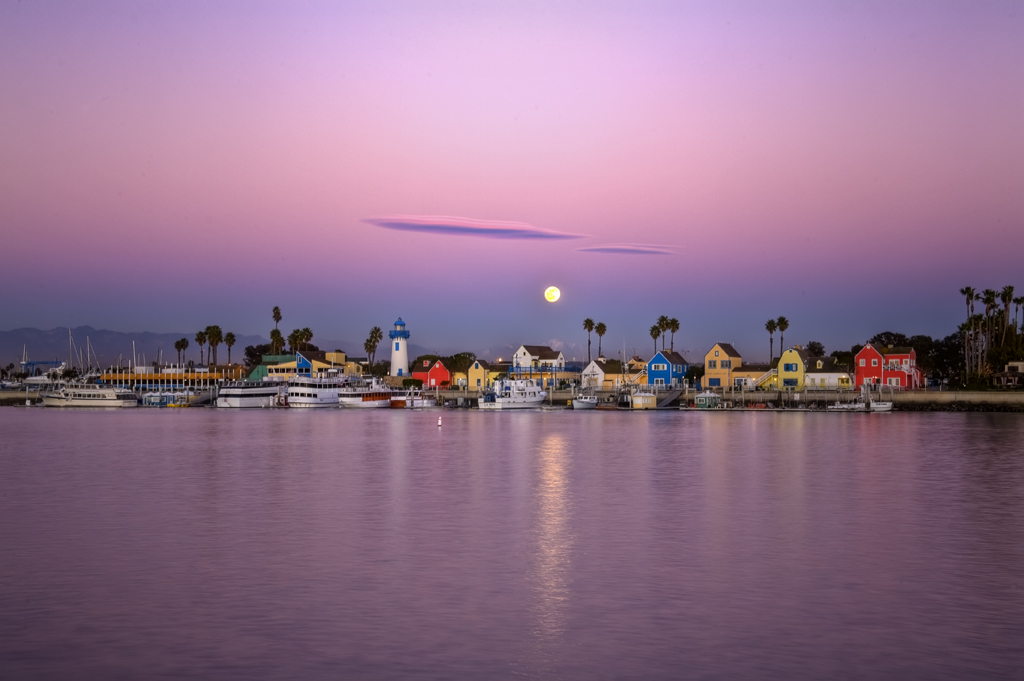
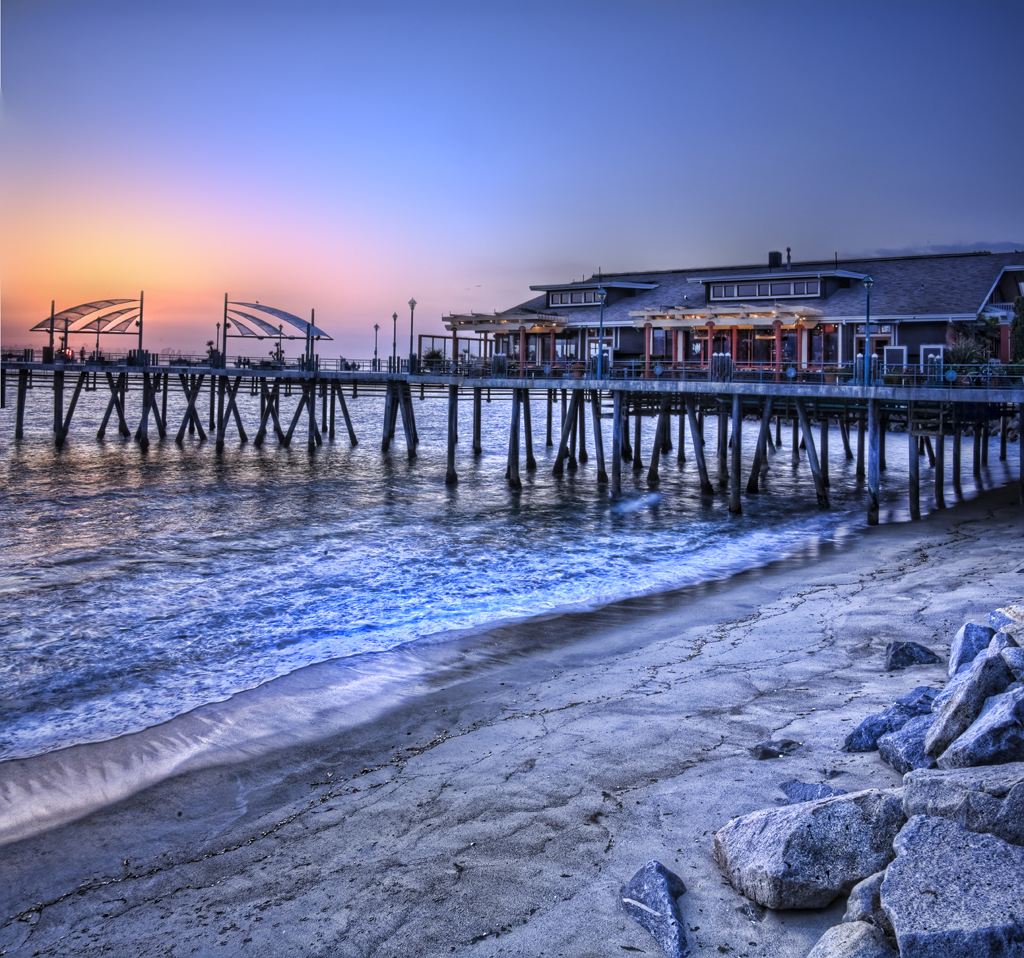
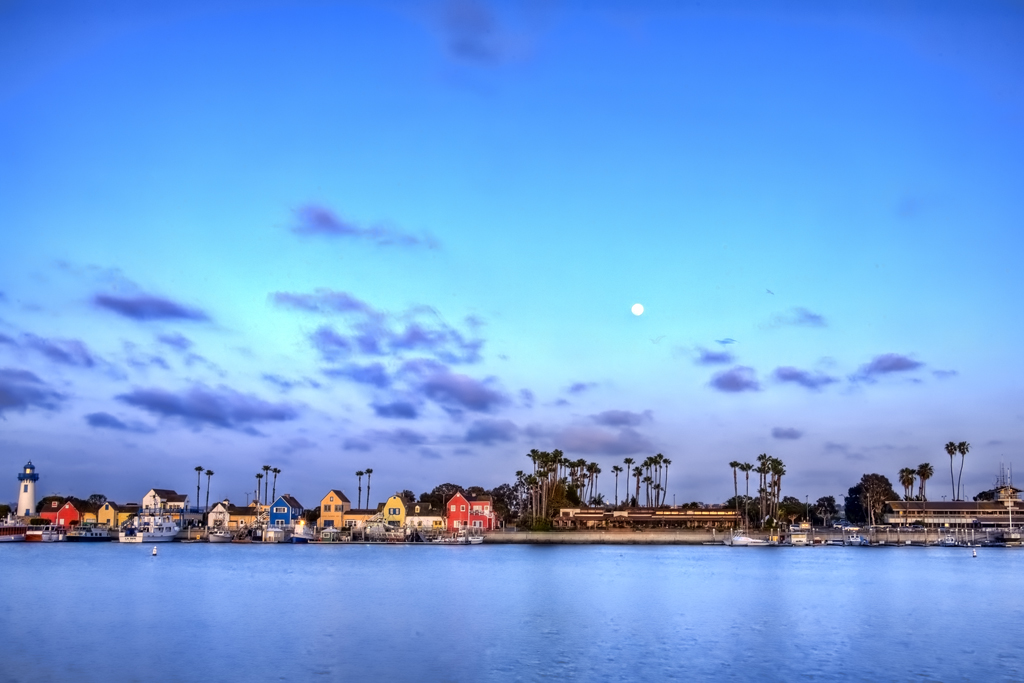
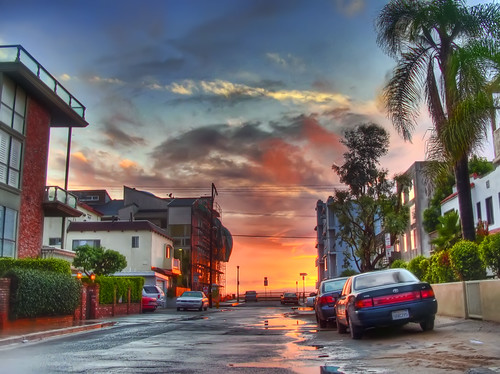
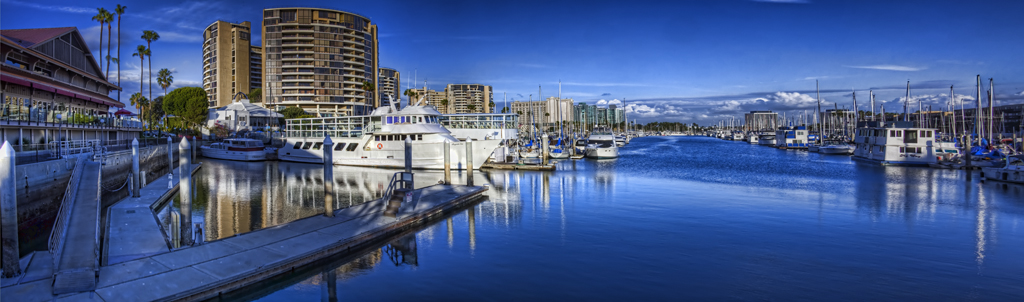
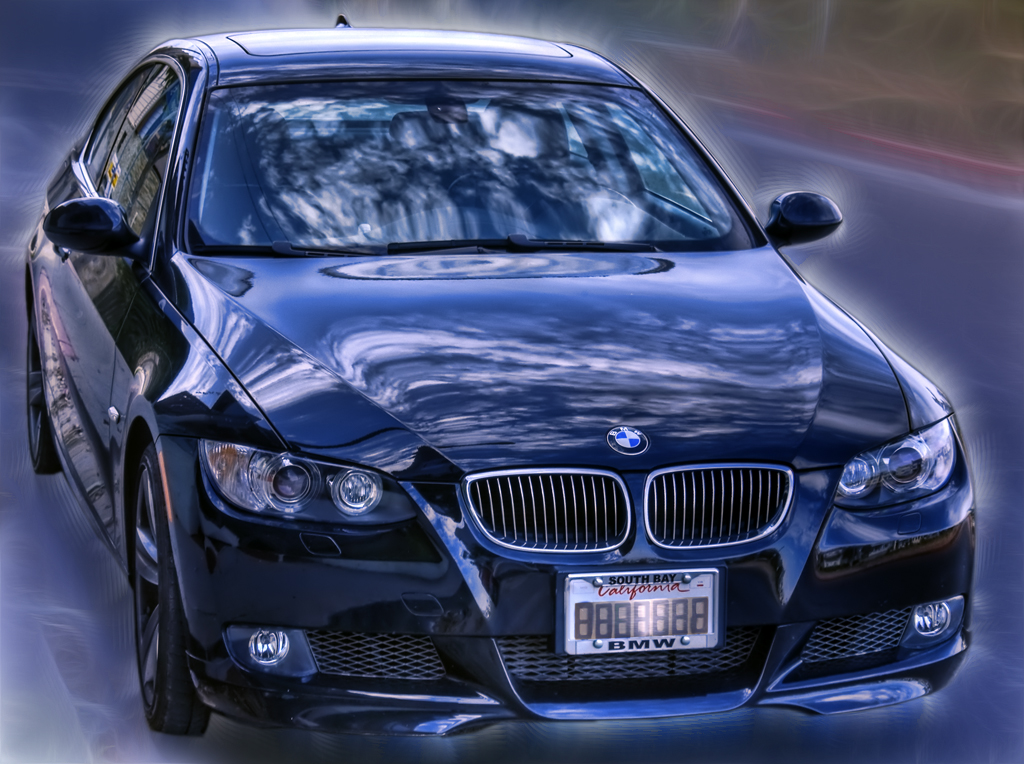
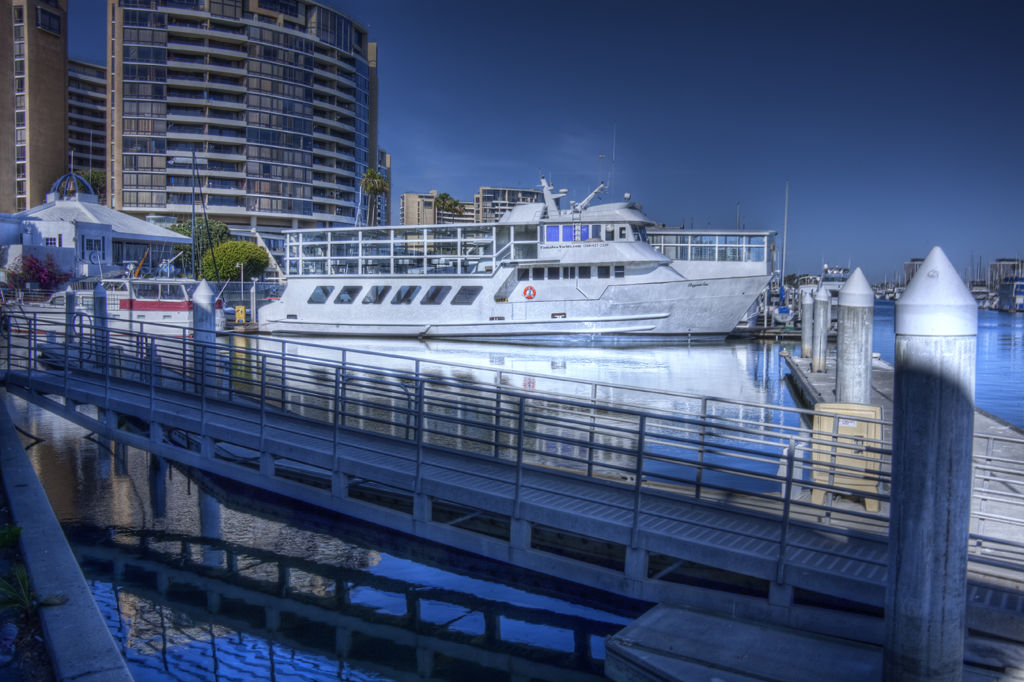
The image above was a black car reflecting a very bright sky on mostly clear day with a few clouds in the sky. So there was a broad range to begin with. On the image below the afternoon sun lit up the boat while the restaurant and dock cast it's shadows on the water.

regentsea 3939 plus 5

So this is a technical definition of what an HDR is - a tonal ratio covering the entire range of light in an image from darkest to lightest.

I'm going to publish this and then go on to how to shoot an HDR my way(s,) in a future post. In my next post I'm going to talk about tonemapping, HDR's, and Single Image RAW file processing.

Sunday, April 12, 2009

Venice Pier Ortons and more ...

As some of you may have gathered, I like taking pictures at the Venice Pier. Especially sunsets!

city of angels sunset II Orton

This started out as 3 exposures from my point and shoot Canon G7. I've hacked this camera to produce RAW files by using CHDK or the Canon Hackers Development Kit. Other extras include expanding the F-stops to F11 (normally the smallest hole on this one is F8.)

CHDK also gives one the option of converting to a digital negative (DNG) in the camera. This raw file goes anywhere and I loaded the 3 exposures into Lightroom. In Lightroom I changed the white balance to Tungsten on all 3 and duped each of the RAW's. On the duplicates I changed the white balance to Florescent. I also added Clarity, Vibrance, and a little Saturation. I now have 6 16 bit files - 3 each of the autobracketed sets with two different white balances. I use Lightroom's export to photomatix plugin and combine all six into one HDR in photomatix.

Tonemapping is done there and I usually use strength, Saturation, Light Smoothing, Microcontrast and White Point adjustments only. On darker images I'll look at Luminosity and Gamma. Also large cloudless skies really benefit from microsmoothing.

Now I save out a .tif and I'm ready for photoshop. In photoshop I like to tweak the levels, and run a noise removal filter. I've often through the kitchen sink at a file in the way of filters and plugins but this time the Orton method mentioned in earlier posts was used. I've described that method here.

I went two ways with this one. First I like playing with Redfield's plugin Fractalius. I've still learning this software but if you reduce your image size before you experiment, it's much more interactive. I went with one of the glow presets on a duplicate layer. I then changed the blending mode for this layer to Screen and flattened the image. This resulted in:

city of angels sunset II fractalius

Then I went back to the Orton shown at the top of this article and made bubbles out of the entire image and comped them on top. No special filters for this as it is straight photoshop out of the box distortion. I lined them up like I thought they would be floating in and altered the transparencies making them more transparent the farther they were "away." You might have seem this already here:

city of angels II Orton  bubbles

So I went overboard on this but it was fun. The sunset was one many great ones we had this winter on February 20, 2009. Any questions, let me know here or on Flickr.

Monday, April 6, 2009

Michael Orton's Sandwich Digital Style

venice pier sunset 0332 Orton

Orton imagery, also called an Orton slide sandwich, is a photography technique which blends two completely different photos of the same scene, resulting in a distinctive mix of high and low detail areas within the same photo. It was originated by photographer Michael Orton. This is from a Wikipedia article about the Orton Technique.

Wikipedia provides you with some examples and then goes on to say:

"Photography enthusiasts, such as groups on Flickr, have embraced the technique and used photo editing programs, like Adobe Photoshop, to replicate it. Some have modified the technique to selectively apply the technique, producing images that have regions of crisp focus and high detail and regions of intense blurriness."

I have written about Orton's before in this blog about Orton images. That article did go through the steps of making the image that article was referring to but I've adjusted it since then.

I've now reduced the Gaussian Blur step to a radius of 3 pixels.

Also I now have a photoshop action which automates the steps. When I figure out where to upload that action I will.

The image at the top had a serious hot spot above where the sun was setting. Any saturation of the image at all resulted in serious banding. Since this was the sky of course I didn't want that kind of sharpness.

So from my previous article here are my Orton steps again:

The digital version starts by duplicating layers in photoshop, then duplicating the top layer again. I then change the blending mode on the very top layer to Screen. I merge down and duplicate this layer again.

Now I take the top layer and sharpen and sharpen edges using those basic photoshop filters. (This step by the way was added thanks to the tip by Chris Anderson) I change the blending mode on this top layer to multiply. I then go down to the second layer and use a Gaussian blur.

This is where I've changed also on advice by Chris Anderson, as I wrote above I now use a much lower blur radius.


Dynamic Photo Hdr Orton Filter option

venice pier sunset 0332 DPHDR Orton

Mediachance has released Dynamic Photo HDR version 4 which includes an Orton color filter which you can use during the tonemapping your HDR step.

This is pretty much a push button and select method as there are no blur or sharpness controls, and no control over the sandwich layer blending. It does have Black and White, Sepia, Sky and Hard Light presets but they're all automated.

So you either like the result or you don't. In this case immediately above I did.

For me either method served the purpose of removing the serious color banding in the sky, however. It comes down to whether or not yoiu like what you see.

Saturday, March 28, 2009

Maserati for sale

There's nothing like a black car for reflections in an HDR image.

This Maserati is for sale at the corner of Lincoln and Washington in Marina Del Rey at Platinum Motors. Only $70K and it's yours!

maserati for sale 1789

I made the HDR from 3 hand held exposures. Once again I had to use CS4 for alignment of the 3 frames. CS4 has good aligning tools for handheld shots.

I tonemapped the resulting HDR in photomatix. I usually use most of the top half of the enhance detail tab pulling the dials back and forth and seeing what looks best. This file was no different.

I used photoshop then to adjust color levels and even out the exposure. I also used noiseware to tone down the noise levels. After this I used Nik Color Effects to tonal adjust some more. This one probably has been processed over the top.

This image was uploaded and then I ran Fractalius on the result.

maserati 1789 fractalius

First I dup the layer. On the duplicated layer I run Fractalius, using the glow 80 preset.I select the canvas and copy it. I then create a mask for the layer and paste what I copied into the mask. This allows the original image to show through.

I flatten it and what you see above is the result,

Tuesday, March 24, 2009

Pink Skies In January.

Looking east over the Los Angeles basin during the last hours of daylight often shows a pink ambience to the sky and city beneath it.

fisherman's village moonrise 3627

It happens every winter in Los Angeles. It's caused by a combination of recurring events. The sun's position changes during the year as we all know and in the winter it is at its southern most position. The sun sets around 5pm in Los Angeles in January and still before 6 in February. That combined with the suns rays travelling through the atmosphere and the dirt in Los Angeles' atmosphere produces this pink color this time of year.

This is from January 10 of this year.

moonrise

It is the same every year. This is college crew team rowing in the same area in January of 2007.

College crew team practice 6948

Actually it's not just January but early February as well. Here's one from February of 2008.

iraq memorial 5325

This was shot on the back of the Santa Monica Pier. The crosses on the beach are for the dead U.S. soldiers in Iraq. This is about the sky though and NOT intended as a political statement. There are other blogs for politics all over the internet. All I was intending here was to show the eastern Los Angeles sky as being pink in the winter.

White balance does come into play of course as I tend shoot on the blue side more often than not. However warming up the white balance only makes it appear more towards orange but pink just the same.

A little bit on processing - generally I use photomatix to generate HDR's unless the alignment is terribly off, then I use Photoshop CS4. In the last two I used lightroom to generate multiple EV's for the HDR as each was a single RAW file. All were tonemapped in photomatix and edited in photoshop for exposure, sharpness and noise removal.

Wednesday, March 18, 2009

Orton and Fractalius at King Harbor

King Harbor 1438 Orton

I think I overblurred this one in the Orton process. I'll explain.

I started with 6 exposures selected out of 15 I shot. It was dark so my exposures were long. The drawback of this is that the boats and everything else on a Sunday evening was moving. So I picked the best ones out of each EV in lightroom and generated the HDR in photomatix. I tonemapped it there also, using similar steps mentioned in other posts below and brought the resulting 16 bit TIF file into photoshop.

I tried shadow highlight in photoshop first but got a lot of banding which sometimes happens so I only used levels and noiseware before the Orton. This effect is based on Michael Orton's sandwich technique.

The digital version starts by duplicating layers in photoshop, then duplicating the top layer again. I then change the blending mode on the very top layer to Screen. I merge down and duplicate this layer again.

Now I take the top layer and sharpen and sharpen edges using those basic photoshop filters. (This step by the way was added thanks to the tip by Chris Anderson) I change the blending mode on this top layer to multiply. I then go down to the second layer and use a Gaussian blur. This creates the sandwich which for the most part is pretty saturated which explains some of the blue tint in this image. The other reason for the blue is my custom white balance setting. This white balance setting on the camera has nothing to do with the real world anymore as it was set a few weeks ago in the late afternoon with a grey card.

I had the Gaussian blur setting at 15.8 radius which looks like it was too high. This varies by image.

I finish this part off by flattening the image. Now it's ready for Redfield's Fractalius.

I first duplicated layers again and ran Fractalius with the preset of of Glow 80. I'm new at Fractalius so I just went with the preset. I then copy the entire result and paste it into a mask for that layer. This allows the white to remain and the rest of the image to show through.

Here's the result:

king harbor 1438 fractalius

Since I don't really know Fractalius yet this image the other one I did earlier looks like a drunken spider laid his web all over the Harbor. I've seen some nice work with Fractalius, but I haven't learned how they do it yet.

Addendum - I went back and cut the blur in half and replaced it on flickr.

2nd Addendum - The blur still appears to be too much - I'll probabloy cut it in half again if I do more of these.

Tuesday, March 17, 2009

Vertoramas at King Harbor

I was asked how I do one of these vertoramas, so I'll go through my way here.

I begin of course at the shoot. I use AutoBracket either on my G7 in CHDK mode or my 5D. This one was shot with my 5D:

king harbor vertorama 1221

I set my autobracket to -2, 0, +2. I try to start around what would be a correct 0 exposure and shoot 3; raise it a full stop; shoot 3 more; lower it two full stops; shoot 3 more and so on until I get a nice range. I'll have some duplicate exposures, but I'll narrow it down in Lightroom.

I do this for a high view and a low view trying to be careful to rotate the tripod head down in a straight line. After I have my two sets I'm ready to import these into Lightroom.

Adobe Lightroom is a database/darkroom for digital photos. Here I make each group of shots into a mini collection and strip out duplicate exposures. Along the ocean you have watch for cloud movements in photo series for HDR as a moving cloud will create a digital "chatter" which doesn't look too good. So I try to choose those that are as close to one another as possible. I also may do a noise reduction here, if the image is dark to begin with.

Once I've gotten 6 to 9 exposures in a row, a stop apart each, I export each group to generate my HDR's. In this case I used Photomatix. Here tonemapping is a personal style or taste thing. Everybody has their own way of adjusting their images. I have mine which you can see here in this image. I generally try to get the bell curve of the histogram as near to the middle as I can. The rest is trying different options to see what I think looks good at the moment.

I write out a .tif for each the top and bottom sections and bring those into photoshop. I use the automate merge function in interactive mode and combine what originally was 30 images into 1 final HDR Vertorama.

Those are the steps I use to make one of these.

Tuesday, March 10, 2009

White Balance Ooops

fisherman's moonrise 0681
Fisherman's Moonrise


A Flickr photographer asked me how I did this shot and edited it. It was a little involved and actually was caused by not resetting my white balance from a previous shoot.

This is what I told her:

Late yesterday afternoon I went to the dock across from Fisherman's Wharf in Marina Del Rey to shoot the moonrise. I was disappointed as I had to wait until it got higher than the low clouds which had moved in.

Since I wasn't pleased by what was happening, I got distracted and forgot to reset my white balance. I had set the white balance on my camera to custom a few nights before to shoot a sunset which was rather yellow. So the camera did a lot of coloring you see here.

I took the best 8 exposures at f16 and ISO 100 out of 15 auto bracketed shots. I combined them in photomatix into an HDR which I then tonemapped in photomatix also. I usually start out with the defaults, then I first look at the white and black levels. The moon was overexposed in most of the shots so I lowered the white level and left the black level alone. I turned up microcontrast as the wharf was quite a distance across the inlet. I increased saturation a little but not as much as this looks. I also raised the strength level to 90%. By now my image was on the dark side so I shifted the gamma to the right which brightened the midtones. I then saved out a tif.

I brought the tif file into photoshop and used imagenomic's noiseware to clean up the noise in the sky. I use levels, and shadow/highlight to make a nice bell curve out of the histogram. I then adjust exposure, enhance contrast and sharpen using smart sharpen or unsharp mask, I can't remember which one but generally it's which one works best.

I also have written a filter in filter forge which I sometimes use to give it an Orton effect. I didn't use this on this image though.

There you have my basic routine but I did't limit myself to this as every photo is different. Sometimes I drop the image into every filter I have just to look at it.

As I told her above this is pretty much my standard routine with variations for all my shots.

Monday, February 23, 2009

Eddie's turn

eddie's turn 0766 part 3

Often with a 500mm lens a moving person or object more than fills a frame. Such was the case with this surfer, eddie, as he approached the pier where I was photographing him.

It was early June. The days were long, the water warm and the waves were really holding up late in the day. This series of shots was taken just before sunset and were quite dark as I shot them at 1/500 of a second. This speed is necessary as these young surfers change directions so quickly they'd be a blur at slower shutter speed.

Eddie was well into a nice long ride when he began to whip back and forth, up and down the face of the wave.

eddie 0763 hdr

His next move was to turn back down. His centrifugal force left him parallel with the water's surface.

eddies turn part 2

He finished off his turn, straightened up and filled the frame as shown the top of this post.

I used Lightroom to generate 2 brighter exposures and one darker one. I was limited as I was ending with shots that were 2 stops too dark so my HDR had to have a light boost. I used the exposure command to add 2ev 4ev and -2ev to the orginal shot. One the brighter images I turned up the noise suppression in Lightroom as it is superior to Photomatix or Photoshops noise filters.

I used the Photomatix plugin to generate the HDR from the 4 exposures as this dumps the TIF temp files when the HDR is made. I used detail enhancement with only a few options adjusted to tonemap the image.

I saved it as a 16 bit TIF which I took into photoshop to edit. Generally I shift the histogram toward the middle using whatever image adjustment options I can until I get a decent Bell curve. The result is what you see here.

Wednesday, February 18, 2009

Mariners Village with a faked Orton


Mariners Village 8832 Orton, originally uploaded by brookville.

Every year the landscape architect at Mariner's Village does a new arrangement for the entrance. I took this shot just to the right of the entrance at Captain's Row.

I first did an HDR with the 3 exposures I took at +/-2 and 0ev. I used photomatix to generate the HDR and tonemap it. I pushed the gamma a little bit in photomatix also because even reducing light smoothing, I was still getting a dark image. My exposures had good histograms but it was an overcast day.

The HDR looked like this:


I took the photomatix output into Photoshop where I further adjusted the exposure.

I then copied the steps from a Michael Orton suggestion on his website and in his book. I started by duplicating the layer twice. I changed the blending mode to Screen on the top layer and merged down with the next layer.

I duplicated the resulting layer again and this time I Gaussian blurred it until the major shapes were there but it was really very much softened. I changed the blending mode of this layer to Multiply.

I used an image adjustment layer with the curves option and played around with the curves a little bit before just settling on the results of "auto."

I then flattened the image to what you see at the top of this post. There are lots of ways to adjust along the way including the radius of the Gaussian blur and the curve adjustment step. Of course you can do anything you want at this point but I was sticking to what I saw in his method of making an "Orton Sandwich."

The 0EV exposure can be seen here:

Sunday, February 15, 2009

HDR and Monopods


reef plantwall 0272, originally uploaded by brookville.

Reef Street contains a wall of plants on the north side between Pacific and Speedway. I wanted to see if I could get the detail clear as there was only a slight breeze.

I was shooting with the camera mounted on a monopod which is really better suited for sports photography rather than HDR. Unless it's planted into some dirt, it's too easy to tilt it and this of course creates alignment problems at HDR creation time.

It as just an experiment but I learned it's not the way to go. Surf Photography - Yes - a monopod is a nice tool. HDR - No.

I only ended up with 4 exposures I could use ranging from -4 through +2 which of course made the image gamma a little darker than I wanted.

I used CHDK's autobracketing function and noticed some problems there too. So I once again updated my CHDK firmware operating system after this series of shots.

CHDK - HDR - Still learning.

Oh I did tonemap in Photomatix including popping the gamma back up to where it should have been to begin with.

Thursday, February 12, 2009

lighthouse 0081


lighthouse 0081, originally uploaded by brookville.

I took this group of shots 10-15 minutes before sunset in between the rains February 5, 2009. I originally shot about 7 or 8 as I recall using CHDK's hacked autobracket option for the Canon G7. It autobrackets and increases and decreases the exposure in the interval set up in the CHDK menu. I set the interval to 2 stops which means on the third interation I am now at +6 and -6 or way past what is necessary. My last two shots were all black and all white. I kept the first 4.

The colors were bouncing off the water creating all sorts of colored light patterns in the clouds. I hadn't intended to take pictures as I was just going to the corner for drinking water. I couldn't pass this up and was stopping on every street. There was no post on this street so I had to brace the camera against my stomache. It's hard to stand still and not breathe while the autobracket sequence continues to change on each shot.

I made tht HDR from the 4 handheld exposures I kept. They were in JPG format, though the Canon G7 hacked with CHDK willl do RAW files. I wasn't prepared and didn't have it set and didn't know until I got home, so this entire set was made from multiple jpg's. Not optimal I know but it still worked.

Tonemapping in Photomatix and Photoshop. The colors were there in the street for the original shot though. Great time of day.

HDR PANORAMA

marina panorama

I shoot a lot of pictures in the marina. The community along the north side of the marina harbor really was fashioned after one of Paolo Soleri's arcologies. As for Paolo Soleri and his politics, that is a discussion for another person's blog. I took these shots for the look of this seaside architecture.

I originally took several autobracketing sequences in each of four overlapping directions. I do my sorting and picking in Lightroom. It allows me to separate into collections the groups of images I will pick my HDR assemblies from. Initially I narrowed it down to 22 pictures in four groups. I had 6 for the left, 5 for left center, 5 for for right center, and 6 for the far right. In Lightroom I also reduce the noise where needed, and make sure I have all the white balances equal. Lightroom outputs 16 bit Tiff's as temp files until the HDR is created. It then automatically cleans those up for you.

Ideally I should have an equal number shots in each group with the EV'S spanning the same range. The shot on the right also contained a fence and walkway where I was shooting from. It didn't add anything to the picture so I didn't use the far right's group of photos.

The final panorama of the north marina harbor shown here is made from 16 shots I kept. The HDR's were first generated for 3 overlapping images (6 exposures,5 exposures,5 exposures left to right as I wrote above.) The resulting HDR's were tonemapped in Photomatix and photomerged into a panorama in Photoshop. The automation in photoshop didn't require any editing. I did adjust the levels and reduced the noise a little further to make a cleaner shot.

Though the left foreground was beginning to be shaded by the Marriott hotel and other buildings, for the most part I had good light. HDR allowed to the shaded part to be more clearly seen.

I already have a wider sequence of the panorama south of the Manhattan Beach pier which I will be working on later if this one goes well.

Wednesday, February 11, 2009

HDR for broad range single shots


The original shot done on the run is here:


Here's another shot in which the foreground was too dark before making an HDR out of it. I was in the Manhattan Village Parking Lot a few minutes after sundown on November 22, 2008. Sometimes the number of stops in an image requires HDR to view the full range. I had to be somewhere so I didn't have time to set up and shoot it for an HDR. It was just one of those see it, shoot it, and run shots. The sunset was too good to pass up. I always shoot in RAW format which gives me 12 bits at least in each channel making it a MDR or medium dynamic range photo.

I used 5 exposures which I generated in Lightroom. I do this so I can control the noise on each exposure. I have tried this in Photomatix but the noise removal in that program doesn't even remotely compare. I also make sure the Black levels are off (set to 0) as it eliminates white and black dots caused by color peaking. Other than noise and black level adjustments, I set my exposures here on single image RAW files. Generally this is all I do in Lightroom although there are exceptions to that statement which I'll explain in another post with another image. I believe I did use Lightroom to crop it too.

I did tonemap it in Photomatix. To get to Photomatx I used Lightroom's plugin which creates temporary 16 bit TIFFs with Lightroom's edits. Photomatix then in turn will generate an HDR after it determines what exposures you want there. I simply use the values in set in Lightroom (generally 0, +/- 2, +/-4) as Photomatix makes its own guess. I haven't compared the two yet but I will. I used photoshop for a final tuneup which usually involves using the image adjustment levels command and if necessary noise reduction.

Though not a true HDR, I think you'll see that turning an MDR image into a 32 bit per channel radiance file, and then processing like an HDR gets more out of a picture when the original picture range has more than 5 stops.

As I've written below there already is a very large debate on what a High Dynamic Range is and isn't so I won't try to to get into that discussion here. You may read more about that subject if you like at:

Mixmaster's HDR discussion

I believe he provides links with more information as well.

Monday, February 9, 2009

Hand held point and shoot HDR


About 20 minutes after sundown I stopped to reshoot an HDR I had done badly the night before on a walk street in Marina Del Rey. I used a Canon G7 hacked with CHDK. It autobrackets and increases and decreases the exposure in the interval set up in the CHDK menu. I realize the G7 will autobracket exposures for 3 shots up to +2 and -2 but CHDK allows me to set larger intervals and the increase and decrease is NOT limited to 2 stops.

I had a little trouble with the hand held part the night before and Photomatix, Artizen and Photoshop did poorly with my poor alignment effort. So I used a post tonight. However the post was flimsy and I didn't fare much better. Photomatix couldn't generate a decent HDR with the 5 frames, but Photoshop did.

I took the photshop result back into Photomatix and tonemapped it there. I like the street and I should redo it with a tripod.

BROOKVILLE ON THE LEFT COAST


I was dashing to the corner in between the rains with my ancient point and shoot G7 not really expecting the sun to pop through the clouds the way it did. The street as you can see was flooded as was part of the walk street I shot this at. It made a nice reflective surface.

I didn't expect to do an HDR shoot when all I went out for was drinking water. There happened to be a couple of short posts at the end of the walk street to keep cars off the sidewalk. I used one to steady the camera. CHDK's latest compile has a bracketing option that allows you to shoot continuously and with each shot in a set, raises or lowers the exposure by the stops you specify. It also adds RAW files to the point and shoot but in this case I forgot to set it and ended up with 5 jpegs. Like I wrote above I really wasn't prepared for this.

I stopped a few more times on the way to the corner. In most cases there were 5-6 pictures taken. More walk streets to come as I process the pics I took.

Intro


I started this blog to write about some of the images I've created.

Some people have asked for more information and in the coming weeks, months etc., I'll be adding to this.

There already is a very large debate on what a High Dynamic Range is and isn't so I won't try to to get into that discussion here. You read more about that subject if you like at:

Mixmaster's HDR discussion

Please note that the above discussion is from a man who has a very strong opinion about his definition.

I don't. To me it's the finished product that you can see for yourself that counts. You either like it, you don't or it doesn't elicit any type of response.

To me, it's up to you.